

 69
69
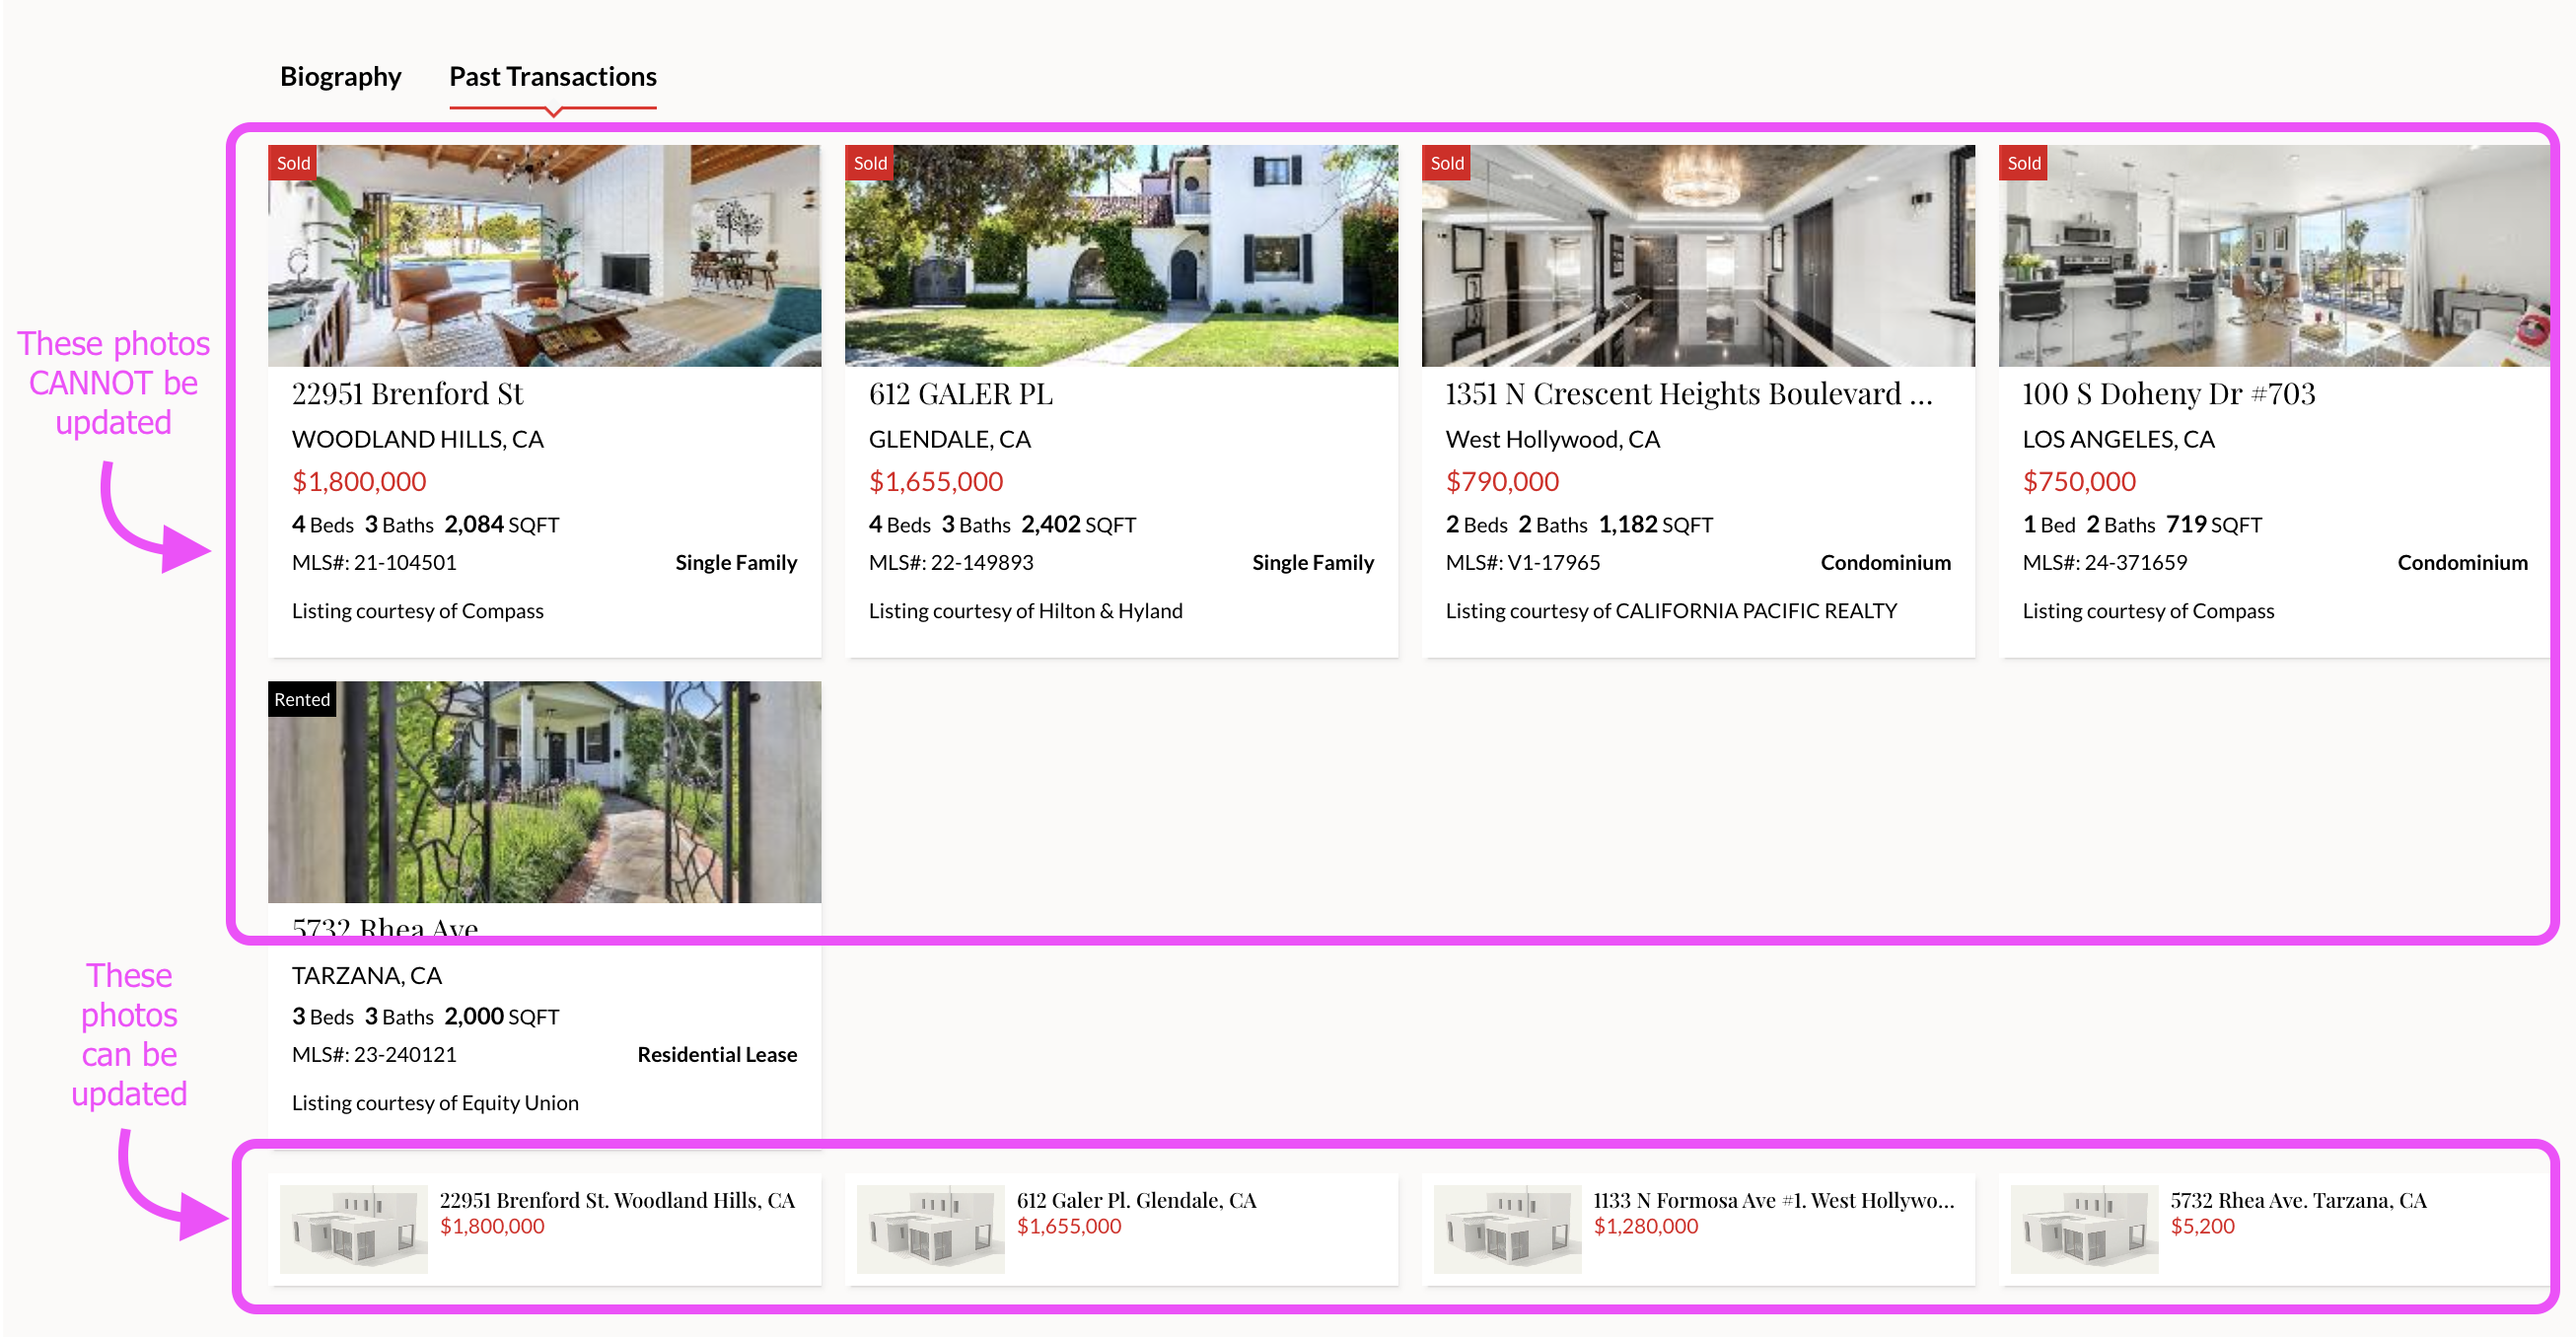
Please Note:
This tutorial is for updating transactions that are in APT under the AGENT SETTINGS > PAST TRANSACTIONS page. You cannot update the listings towards the top as these are syndicating from the MLS. See the screenshot below for further clarification:
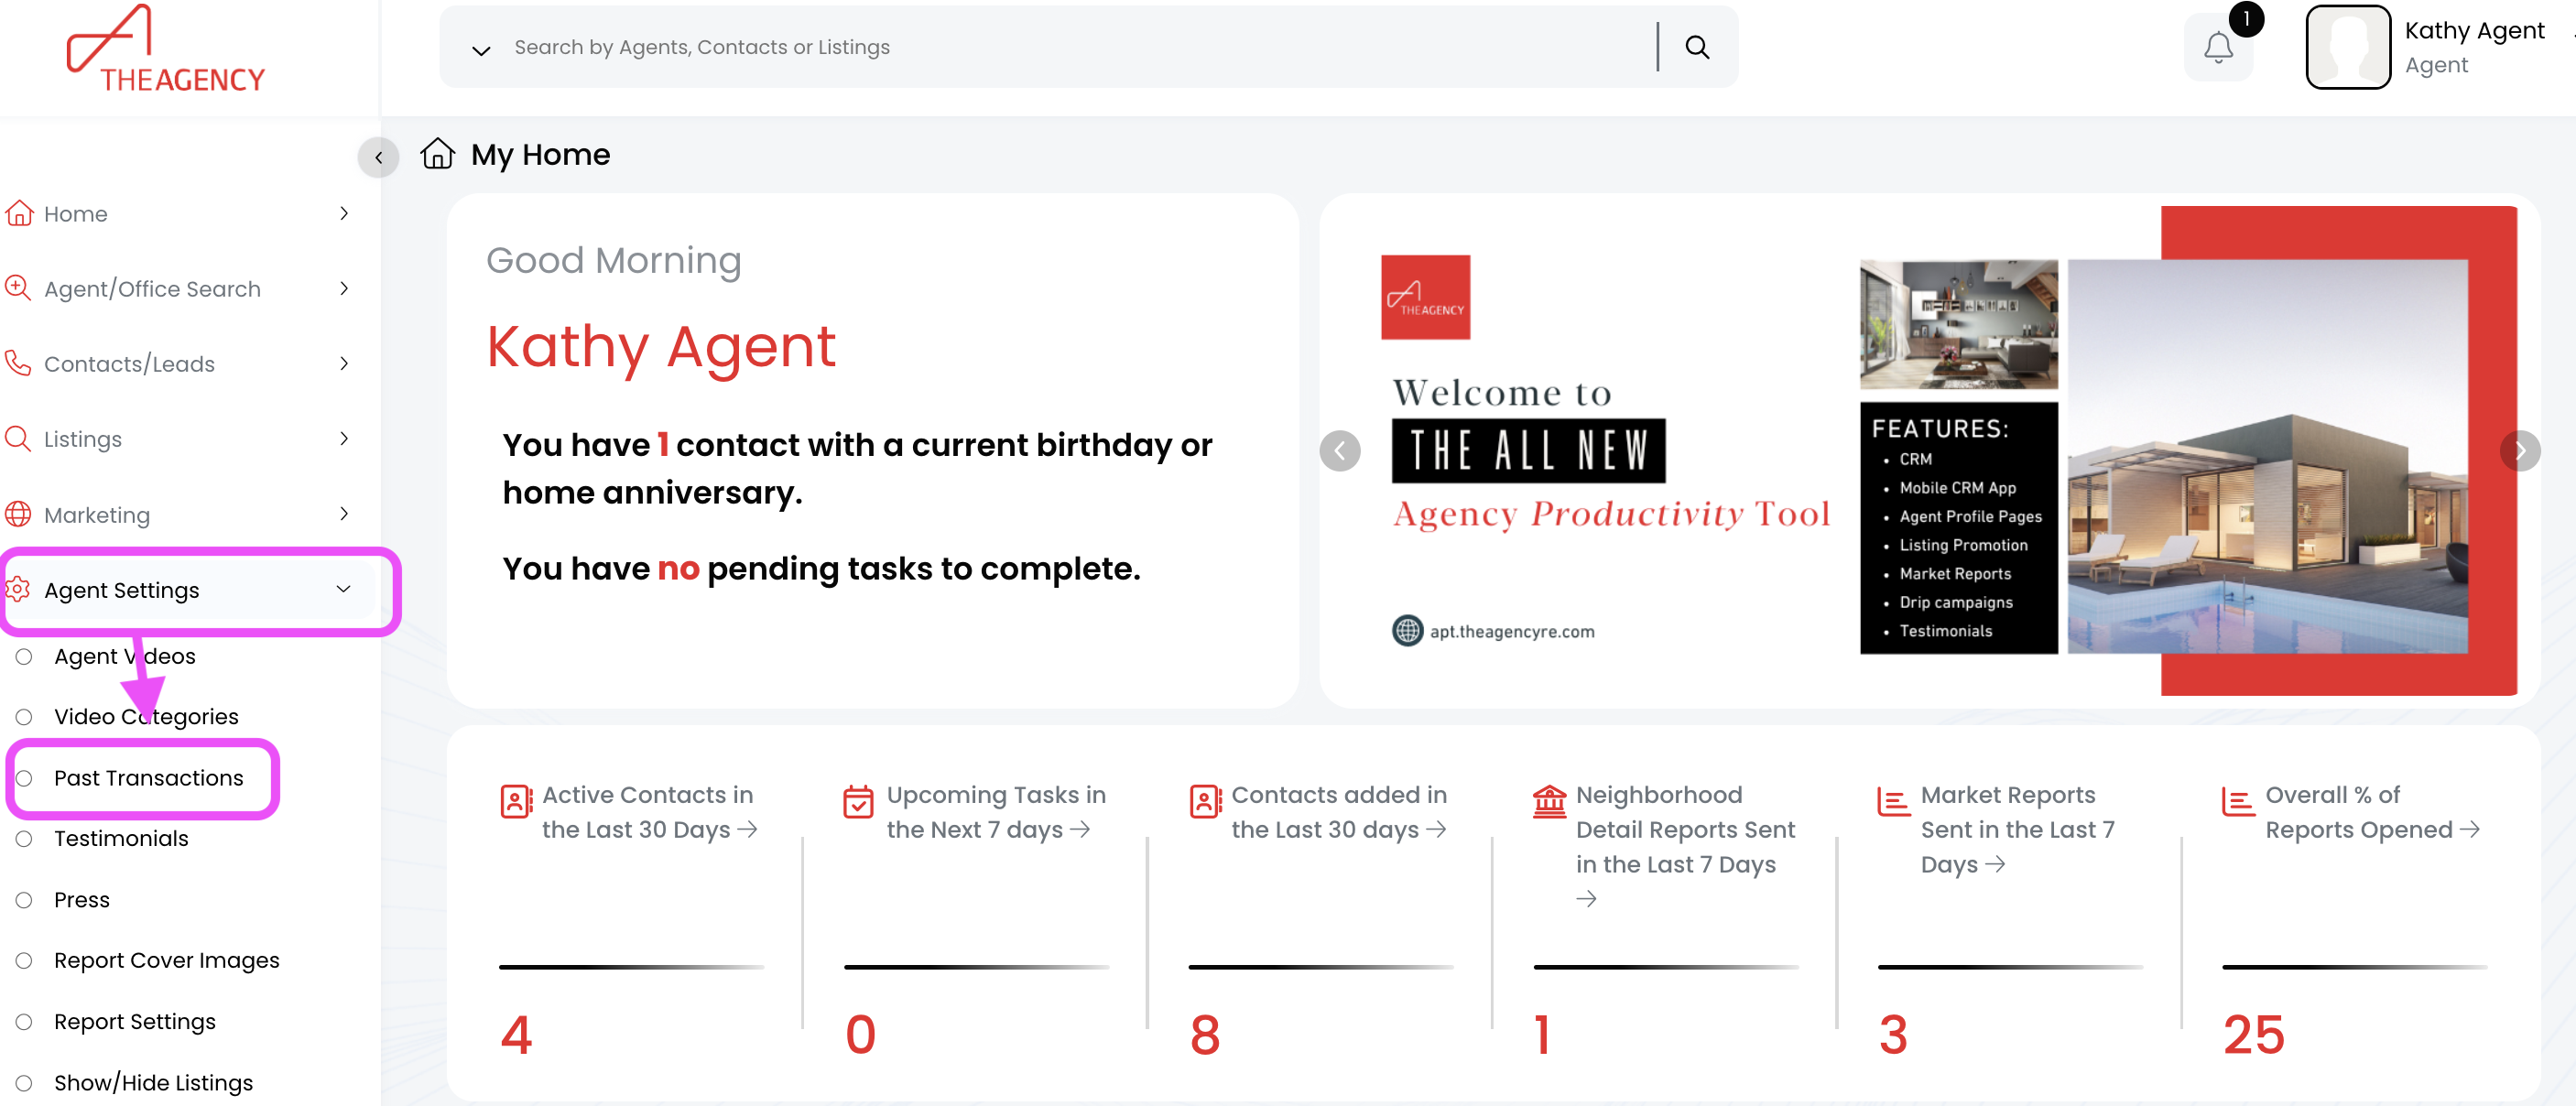
1.) Click on the Agent Settings tab, then click on Past Transactions
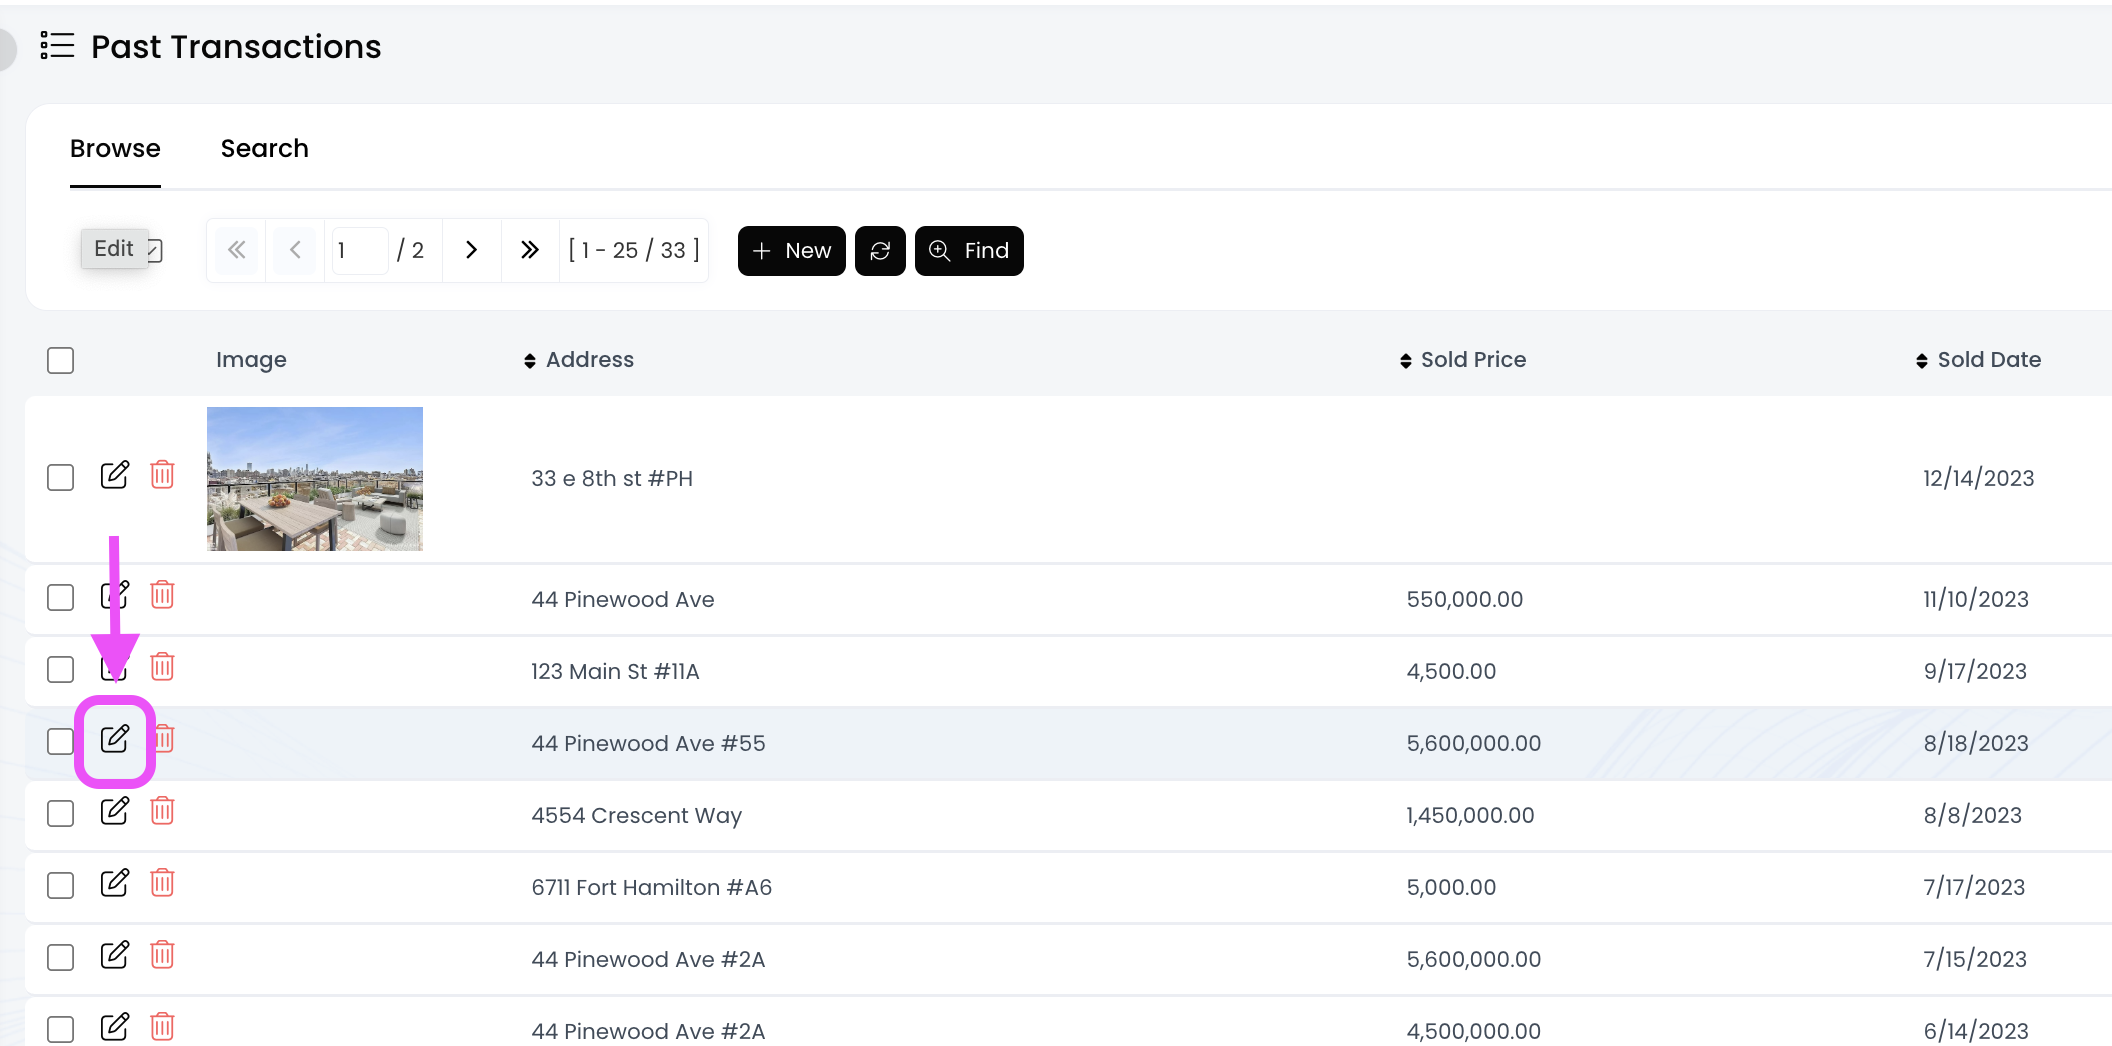
2.) Locate the transaction you want to update, and then click on the pencil icon towards the left. (You can always click on the Find button at the top to search by address)
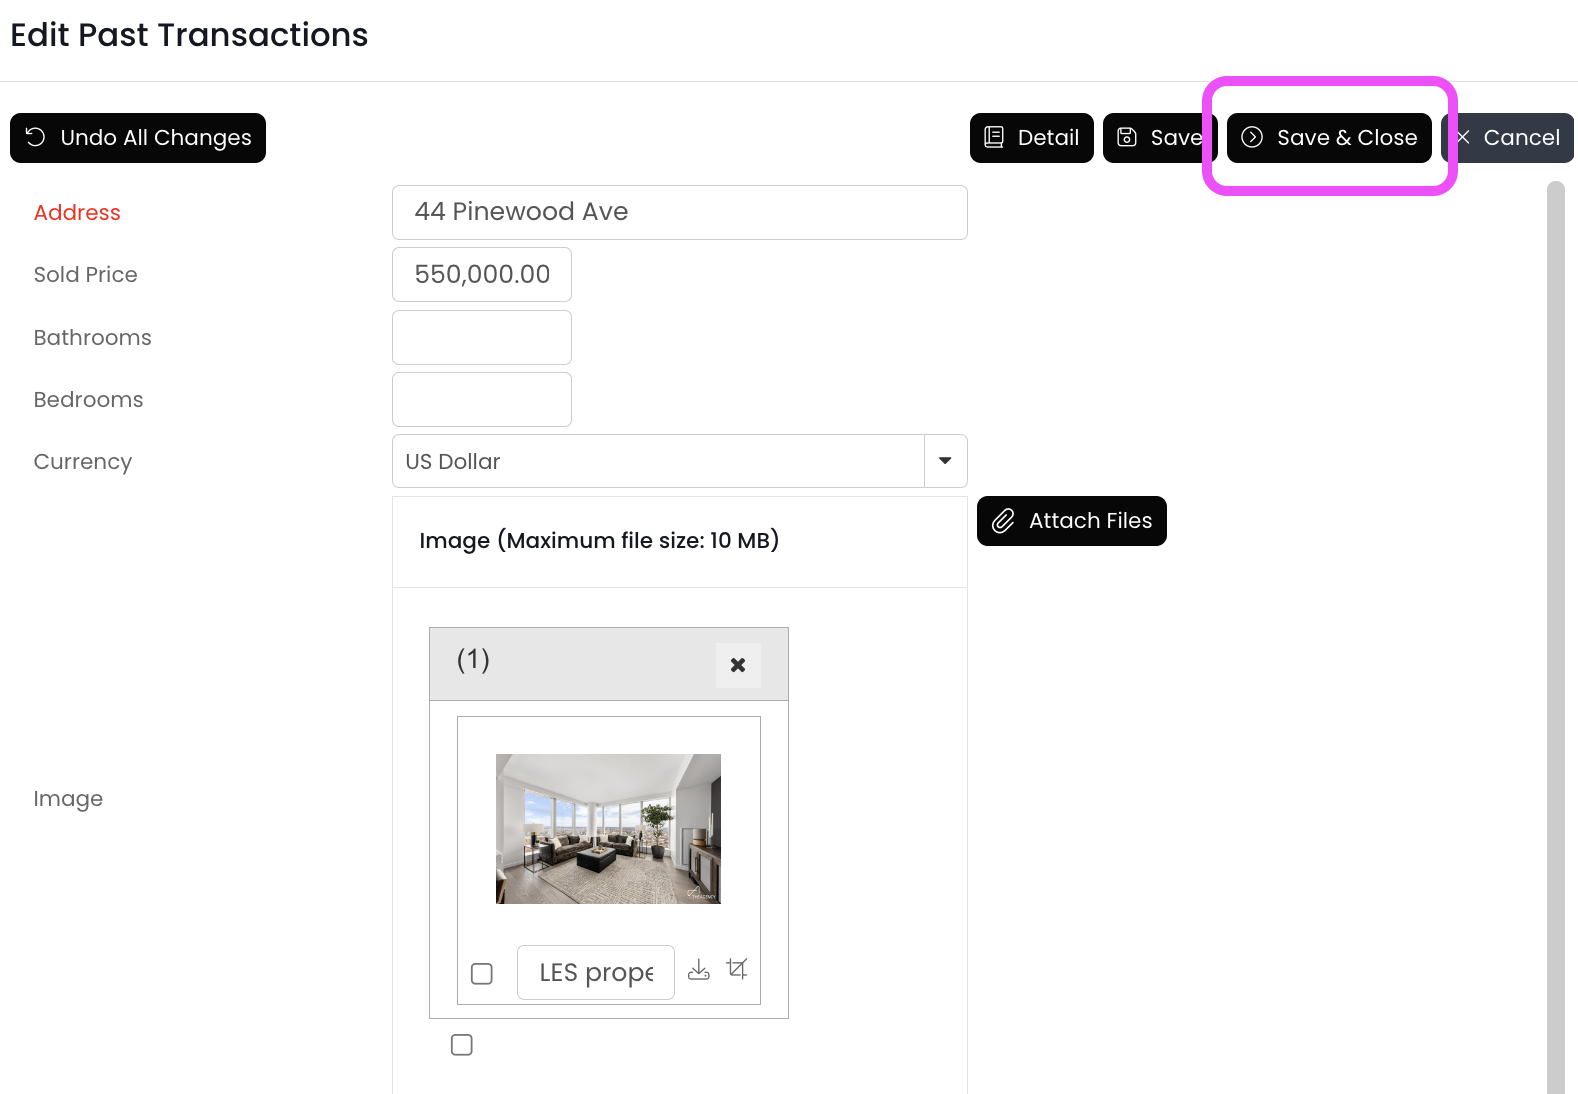
3.) Click on the Attach Files button
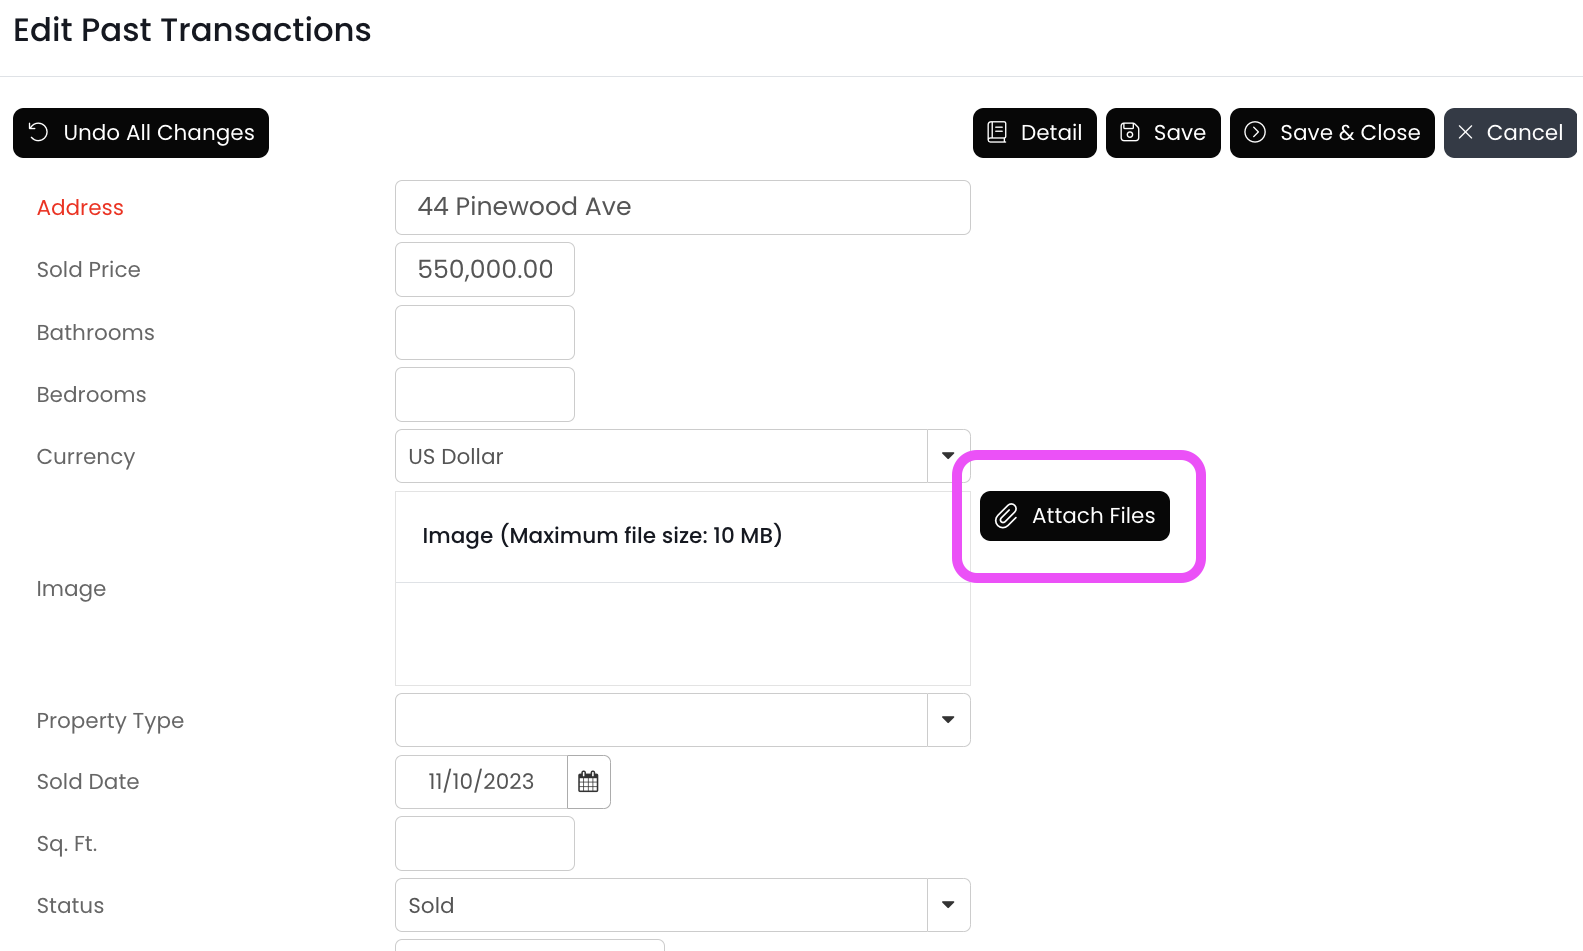
4.) Find the photo file you want to use, and then double-click on it to upload

5.) Click the Save & Close button (top right)
The newly added photo should be displayed on your agent page shortly!

